

Markup Summary
A markup summary is a way to publish a report of all of the markups, making it much simpler to communicate and manipulate data important to large projects. A summary differs from exporting markups primarily because the data contained in the summary is formatted so that it can be read by other programs.
Users can choose to create a single markup summary for multiple PDFs or individual summaries per PDF included in a batch. Multiple summaries can even be generated per Space, Author, or any other data type found in the Markups list.
Summaries are highly configurable with extensive filter and sort options and users can generate custom-designed PDF reports complete with company logo or export XML and CSV summaries, making highly useful data extremely portable. Export settings can be saved to make recreating customized markup reports quick and easy.
A Markup Summary can be initiated from the Batch menu, the Markups List or the Thumbnails panel.
- From the Markups list toolbar, click
 Summary and select the desired output type (CSV, XML, PDF, or Print). The Markups Summary dialog box appears.
- This same menu is available from the Thumbnails panel. Go to Thumbnails > Markup Summary and select the output type.
- Alternatively, go to Batch > Summary. This will default to the CSV output type, but this selection can be changed in the Export as menu later.
- To work with a previously saved batch of PDFs, click Load and select the desired batch file.
- By default, the PDF that is currently active is automatically included in the summary. To include additional files, select one of the following options from the Add menu:
- Add Files: Adds individual files from a network or local drive. Selecting this option will cause the Open dialog box to appear. Navigate to the appropriate location and select the desired files.
- Add Open Files: Adds all files currently open in Revu.
- Add Folder: Adds all files in a selected folder on a network or local drive, but not files contained in subfolders. Selecting this option will cause the Select Folder dialog box to appear. Navigate to the desired folder and select it.
- Add Folder (including subfolders): Adds all files in a selected folder on a network or local drive as well as all files within any of its subfolders. Selecting this option will cause the Select Folder dialog box to appear. Navigate to the desired folder and select it.
- Add Current Set: Adds all files contained in the current Set.
- To remove a file from the list, select it and click Remove.
- To save this batch of files for later use, click Save.
Click the Columns tab.
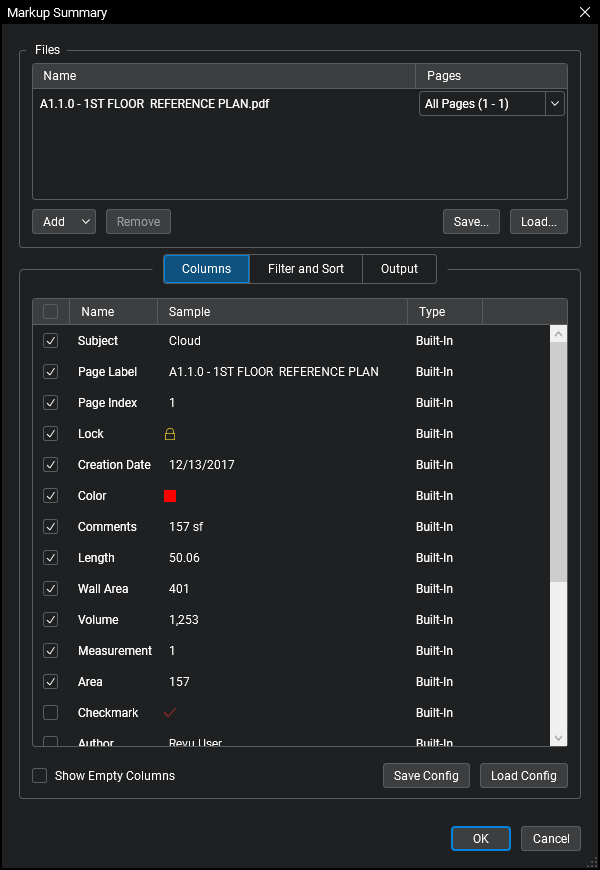
- Select the markup data that should be included in this summary report from the list.
- If you would prefer to use a previously saved configuration, click Load Config and select the desired configuration.
- Columns that do not contain markup data currently will also be missing. Enable Show Empty Columns to include them. This allows users who are creating a summary early in the life of a project to include all the columns they know they will eventually need and thus maintain a consistent report format throughout the life of the project.
To change the position of a particular piece of markup data in the report, drag and drop it into the desired position.
- This is only going to affect the order in which the data is presented, not the order in which it is sorted. For example, you might want File Name to be the first piece of information in the report, but also want to sort by Subject. In that case, you would move File Name to the top of the list here. Sort order is determined later in the process.
- Also, please note that you will have the opportunity to create separate reports based on whatever markup data is at the top of the list, so if that is desired, be sure to move the necessary data element to the top.
Click the Filter and Sort tab.
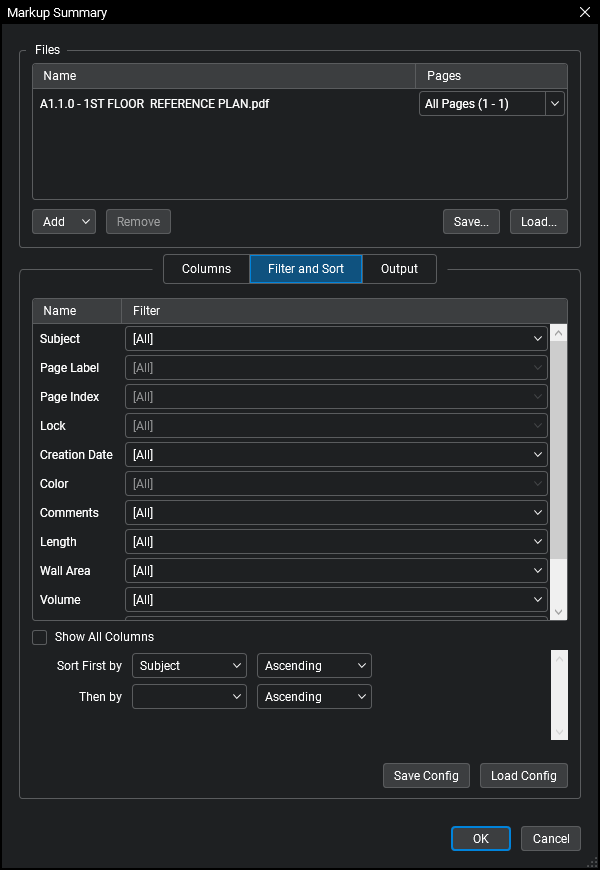
- To filter markup information, click the associated entry in the Filter column (by default, they are all set your preexisting Markups list filters or, if no filters were applied beforehand, to [All]) and select the items that should appear in the report. This allows the summary to be filtered so you only see, for example, issues in a particular Space or Markups from a particular author or something similar, allowing you to get the report you want without requiring the summary to create redundant line items.
- To filter by data that is not being included in the summary, select Show All Columns.
To sort the information that appears on the report, choose one or more sort options, starting with Sort by. All subsequent sort options will be labeled Then by and a new one will appear anytime one is set. Choose whether to sort each selection in Ascending or Descending order from the associated menu.
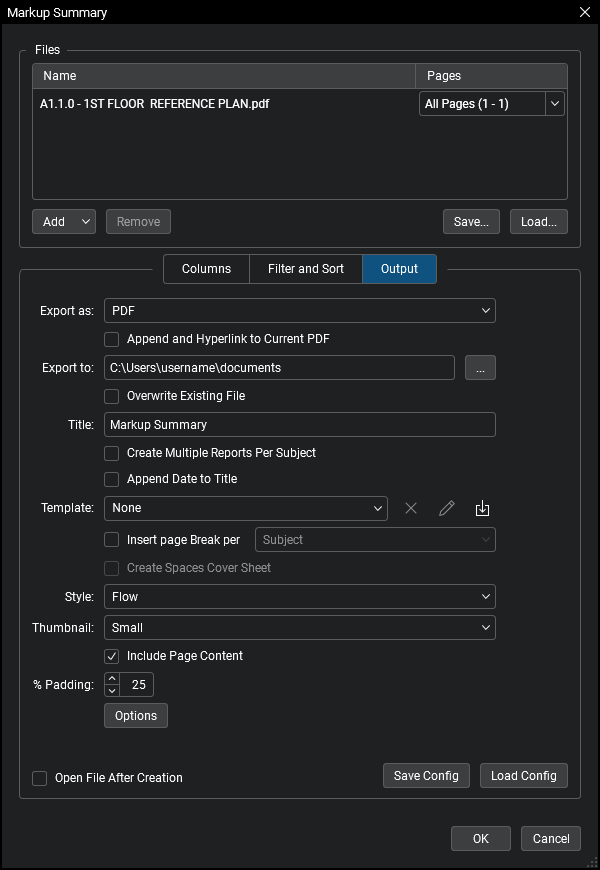
Click the Output tab.
- Select the desired format for the summary report from the Export as menu. This selection will change some of the output options shown.
- If the summary report was initiated from the Markups list or the Thumbnails panel, this will match the selection made then. If it was initiated from the Batch menu, it will be set to CSV. In any case, it can be changed at any time.
- To automatically open the report after it has been created, select Open File After Creation (does not apply if Export as is set to Print).
- To overwrite any existing files with the same name in the save location, select Overwrite Existing Files (does not apply if Export as is set to Print).
- Confirm that the location in the Export to field is acceptable. To change it, click Change and select the desired folder (does not apply if Export as is set to Print).
- Change the Title, if desired. The name of the summary file will be based on this information.
- To add the current date to the end of the Title, select Append Date to Title.
- To create separate reports based on the primary sort data (that is, the data at the top of the list on the previous screen), select Create Multiple Reports Per [data] (does not apply if Export as is set to Print).
Other options vary by Export as file type. Set them accordingly:
 CSV Options
Include: Select the type of data to include in the report:
- Markups: Includes just markup data.
- Totals: Includes just the totals calculated by the current sort column in the Markups list.
- Markups & Totals: Includes both markup data and sort totals calculated by the current sort column in the Markups list.
Column Headers: Select this option to add a row to the top of the CSV that contains the column names from the Markups list.
ID Columns: Select this option to add columns for ID and Parent to the CSV. This is particularly useful for grouped markups, which will have their parent markup specified in the Parent column.
Measurement Units: Select this option to add columns for the units of measure next to measurement data included in the summary.
Format Numbers: Select this option to preserve the number formatting of custom columns included in the report. When left unchecked, the numbers in these columns will still be included in the report, but they will be unformatted.
Replies: Select this option to include replies from the Markups list in the summary report.
XML OptionsInclude: Select the type of data to include in the report:
- Markups: Includes just markup data.
- Totals: Includes just the totals calculated by the current sort column in the Markups list.
- Markups & Totals: Includes both markup data and sort totals calculated by the current sort column in the Markups list.
Measurement Units: Select this option to add columns for the units of measure next to measurement data included in the summary.
Format Numbers: Select this option to preserve the number formatting of custom columns included in the report. When left unchecked, the numbers in these columns will still be included in the report, but they will be unformatted.
Replies: Select this option to include replies from the Markups list in the summary report.
PDF OptionsAppend and Hyperlink to Current PDF: Select this option to append the summary to the current PDF and include hyperlinks to the original markups.
Template: Use this option to select a PDF report template on which to generate your report. New PDF templates can be imported using the
 Import button. Once a PDF template is imported, it will appear in the Template list until it is deleted using the
  Remove button.
- Click
 Edit to redefine the report area on the PDF template.
Insert Page Break per: Select this option to create page breaks according to the data selected in the associated menu.
Create Spaces Cover Sheet: Select this option to include a cover sheet containing a large representation of the Space referenced before each page break. Only available when Insert Page Break per is set to Space.
Style: Choose Table or Flow.
Flow: In this summary style, markups are summarized one at a time, with a report-style block of information.
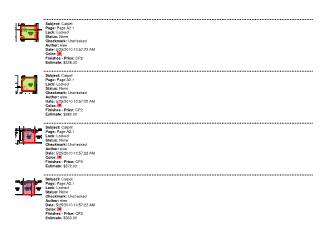
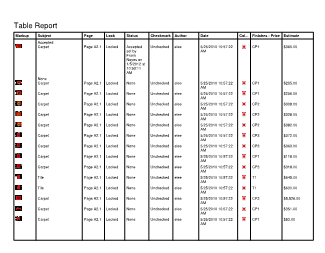
Table: In this summary style, markups are summarized in a tabular format to more closely mimic the look of the Markups list itself.
Thumbnail: Select the size of the thumbnail image for each markup shown in the summary. The thumbnail includes the markup appearance as well as the underlying PDF content (if Include Page Content is selected) in the region of the PDF where the markup is located.
Include Page Content: Select this option to include the underlying PDF content as part of the preview area in the summary. When left unchecked, only the markup is included. Enabling this option can add to the time it takes to generate the summary significantly so if you don't need it or if your summary is taking a very long time to generate, leave it disabled.
Padding: Enter the amount of surrounding context shown around the preview image included in the Markup Summary. Setting a higher value provides more surrounding context.
Other OptionsClick Options to set any of the following:
Page Size: Select the page size and orientation (Portrait or Landscape) of the PDF output.
Include Totals: Select this option to include the totals calculated by the current sort column in the Markups list on the report. This is particularly useful for easy subtotaling by subject or subcontractor.
Include Absolute Hyperlinks: Select this option to include an absolute path hyperlink with each markup in the summary report that links to the markup's page in the source document.
Include Capture Media Addendum: Select this option to include larger views of all images and videos embedded with Capture as an addendum to the report. This is useful when the thumbnails allowed on the summary page are too small to be effective (which is common when there are multiple images or videos embedded in one or more markups).
Attach Media as Linked Files: Select this option to attach images and videos embedded with Capture to the summary report.
This option is only available when Include Capture Media Addendum is selected.
Replies: Select this option to include replies from the Markups list in the summary report.
Print OptionsTemplate: Use this option to select a PDF report template on which to generate your report. New PDF templates can be imported using the
Import button. Once a PDF template is imported, it will appear in the Template list until it is deleted using the Remove button.- Click Edit to redefine the report area on the PDF template.
Insert Page Break per: Select this option to create page breaks according to the data selected in the associated menu.
Create Spaces Cover Sheet: Select this option to include a cover sheet containing a large representation of the Space referenced before each page break. Only available when Insert Page Break per is set to Space.
Style: Choose Table or Flow.
Flow: In this summary style, markups are summarized one at a time, with a report-style block of information.
Table: In this summary style, markups are summarized in a tabular format to more closely mimic the look of the Markups list itself.
Thumbnail: Select the size of the thumbnail image for each markup shown in the summary. The thumbnail includes the markup appearance as well as the underlying PDF content (if Include Page Content is selected) in the region of the PDF where the markup is located.
Include Page Content: Select this option to include the underlying PDF content as part of the preview area in the summary. When left unchecked, only the markup is included. Enabling this option can add to the time it takes to generate the summary significantly so if you don't need it or if your summary is taking a very long time to generate, leave it disabled.
Padding: Enter the amount of surrounding context shown around the preview image included in the Markup Summary. Setting a higher value provides more surrounding context.
Other Options:Click Options to set any of the following:
Page Size: Select the page size and orientation (Portrait or Landscape) of the PDF output.
Include Totals: Select this option to include the totals calculated by the current sort column in the Markups list on the report. This is particularly useful for easy subtotaling by subject or subcontractor.
Include Absolute Hyperlinks: Select this option to include an absolute path hyperlink with each markup in the summary report that links to the markup's page in the source document.
Include Capture Media Addendum: Select this option to include larger views of all images and videos embedded with Capture as an addendum to the report. This is useful when the thumbnails allowed on the summary page are too small to be effective (which is common when there are multiple images or videos embedded in one or more markups).
Replies: Select this option to include replies from the Markups list in the summary report.
- To save the configuration, click Save Config.
- Click OK. The report is generated.
Help Guide
Revu 20

-
-