

Add MySQL JDBC Driver to Eclipse
This tutorial shows you the way to add the latest MySQL JDBC driver to Eclipse. Same steps can be followed to add any other JDBC drivers to Eclipse.
Step 1:
Download and extract the MySQL JDBC connector, from this link: Download Connector/J
Step 2:
Copy the mysql-connector-java-xxx-bin.jar file to any desired folder.
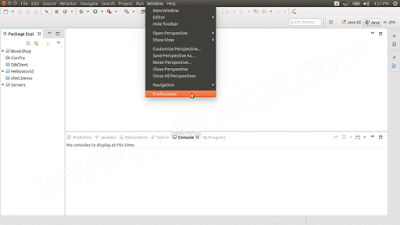
Step 3:
Go to the Window → Preferences in Eclipse.
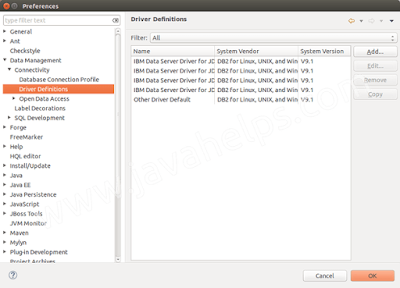
Step 4:
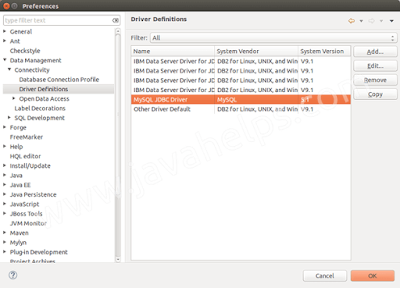
Expand the Data Management → Connectivity → Driver Definitions and click on the Add button.
Step 5:
In the appeared New Driver Definition dialog, select the MySQL in the vendor filter combo box and select the latest MySQL JDBC Driver from the listed drivers.
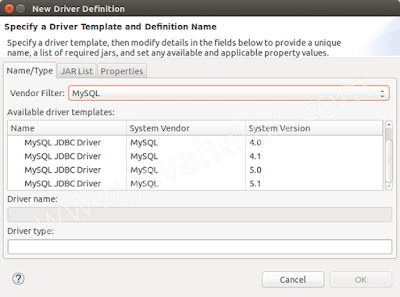
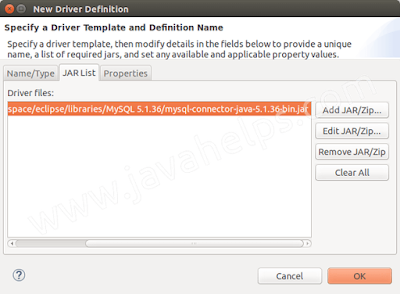
Once you have selected the MySQL JDBC Driver, switch to the JAR List tab.
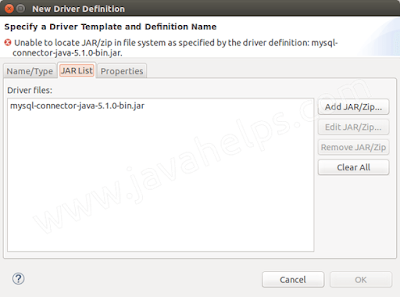
Step 7:
Click on the "
Add JAR/Zip" button or select the existing driver if available and click on the "Edit JAR/Zip" button.Step 8:
Browse and select JDBC connector JAR file and click OK.
Step 9:
Double check the added driver in the list of available driver definitions and click OK.

-